No matter how organized you may be, chances are that you still have that drawer. You know the one; it’s the drawer that’s conveniently located along a high traffic area in your home, and is large enough to hold an assortment of odds and ends that don’t really have anyplace else to go. And that’s what it ends up becoming: a junk drawer. And, no matter how many times you clean it out and try to find a solution, it always somehow ends up as the place you stick things when you‘re in a hurry.
But the reality is that it’s not your junk drawer that’s causing the problem; it’s the fact that your drawers are lacking in a coherent organizational system. By reevaluating how you store objects in drawers, you’ll be able to find a spot that makes sense, for everything you’ve been cramming into that one drawer. Here are five ideas to help get you started.
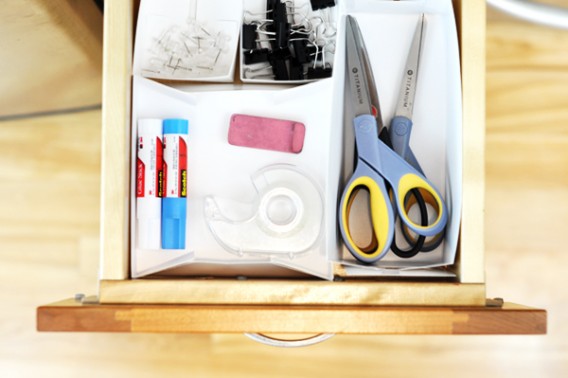
Shoe Box Drawer Separators
You can fix a ton of your drawer issues with a simple drawer separator (no matter what the room or item). These can be easily purchased online or in home/office supply stores, but if you have more than a few drawers that you’d like to organize, it might end up costing you more than you want to spend to buy a fancy drawer separator for each one. Instead, recycle some old shoeboxes (or ask a local shoe store for some extra ones) and turn them into drawer separators with a few simple cuts.
Step 1: Separate the two halves of the shoebox and measure them for height. Figure out which half will work for your drawer. If you need to, cut around the top of the taller box to make it fit perfectly in the drawer.
Step 2: Once the height of the box is what it should be, you can begin cutting it into sections. Cut along the center middle in both directions until you have 4 L-shaped pieces. Don’t worry that two sides of each of the pieces won’t have edges; the edges of the drawer will act as sides once the separator is in place.
Step 3: Place the separators in the drawer and cut the pieces accordingly so they fit perfectly within the drawer. You may need more than one shoe box per drawer.
You can also experiment with cutting the box in different areas to make smaller or larger pieces, depending on the items you need to organize. You can also ask your local shoe store for different size boxes (after all, not all shoeboxes are the same size and shape). Kids shoe boxes may not need any cutting at all. If you are worried about how your drawer will look with pieces of cut-up shoeboxes inside of it, you can paint the insides of the boxes or cover them with drawer liner to make them more appealing.
Mason Jar Drawer Organizer
Hair ties, paper clips, spices, buttons, coins, and other small things tend to get misplaced the quickest. Keeping these teeny tiny bits organized is essential for any room, but dropping them down into the bottom of a drawer is a surefire way for them to end up lost or disorganized. But there is an easy solution that can keep your miniature odds and ends organized: Mason jars.
Step 1: Mason jars come in all kinds of sizes. Measure the drawer you’d like to use and find a corresponding Mason jar size to fit it.
Step 2: Specify your jars. For metal things such as paper clips, you can attach a small magnet on the inside cover of the jar so that all you have to do it shake the jar and remove the cap to get an item out. For all the jars, you can paint the tops whatever color you prefer and begin to label them with what’s inside. It may be a good idea to paint with chalkboard paint and label with chalk so you can reassign jars to hold different things as the need arises. Labeling will help you to find things easier as you will be looking at the jars from the top when they are in the drawer.
If you are using this method for spices, make sure you put small dispensing spoons inside of the jar, so that you can quickly and easily scoop out small amounts when you need to.
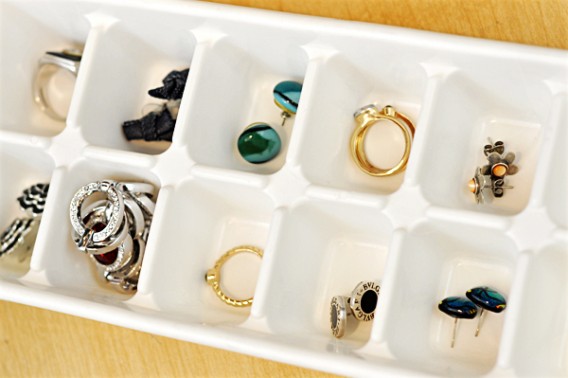
Egg Crate/Ice Cube Tray Drawer Organizer
Here’s another great way to organize tiny things in drawers without any fuss at all. Grocery store egg containers and ice cube trays are the perfect size for jewelry or office supplies. If they aren’t aesthetically pleasing to you, you can always paint them as you wish! You could also find ice cube trays with fun designs such as hearts or fish to use.
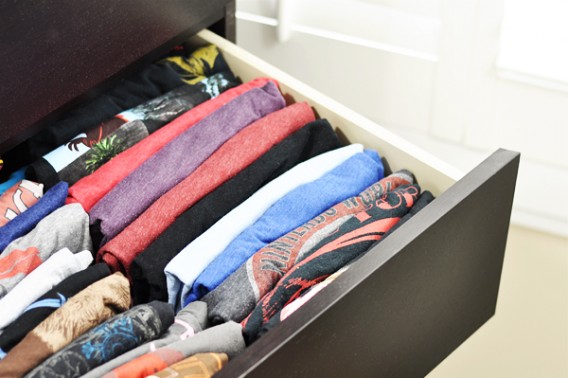
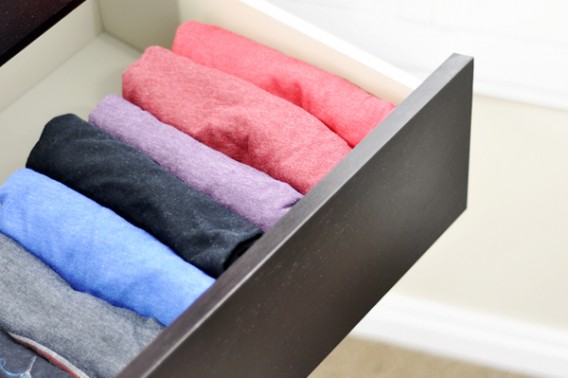
It’s all in the Fold
When it comes to organizing drawers for clothing, sometimes a separator can be more of a hassle than a hack. As soon as you clean your clothes and then place them back in the drawer, your separator will just have to be realigned or even replaced. Instead of wasting time and resources on a solution that doesn’t really fit, the hack here is to learn how to fold your clothes for optimal storage space. Simply choose the method that works best for you:
Flipping clothes up on their side: This is a great hack if you seem to always want the item on the bottom of the stack. Pulling out that item can ruin the rest of the neatly folded clothes! So, forget all that and simply fold the clothes so that they lay on their side. This will also give you the opportunity to see what is in the drawer without needing to dig through it.
Roll up method: Rolling clothes up is a reliable space-saving method employed by backpackers around the world. Take a page out of their book and save the ultimate amount of space while organizing by rolling up clothing and placing them in your drawers. Even as you move clothes around, they will be much easier to get to! Just be warned: rolled up clothes have a tendency to wrinkle…
Genius Clothing Dryer Rack Drawer
Dry racks can take up a lot of space on the floor, instead turn a drawer (or two) in your laundry room into a drying rack! All you need is an empty drawer, some wooden rods from the hardware store and some strong wood glue.
Step 1: Measure the inside of your drawer and decide whether you want the rods to go vertically or horizontally across.
Step 2: Take your measurements to the hardware store and have them cut thin, but sturdy wooden rods to the correct size. Buy as many as you need to fit the drawer leaving 2–3 inches in between each rod.
Step 3: Don’t forget to purchase a super strong wood glue (you can also use nails to keep the rods in place, but it’s not necessary).
Step 4: Remove the bottom of the drawers carefully.
Step 5: Take your wood rods and place them inside securing them in place with either wood glue or nails—whichever you prefer.
Viola! You have an awesome clothing drawer rack inside a drawer! Perfect.

5 Drawer Organization Ideas
Apartment Living

Recommended Articles
Apartment Living
7 Min. Read
How to Create a Beautiful Patio or Balcony Space
Renting an apartment often means letting go of the luxury of a big, private yard. However, just because you’re in an apartment doesn’t mean you can’t have your own outdoor space. Many modern condos…
Apartment Living
7 Min. Read
The Pros and Cons of Renting a House
There are many reasons why you might choose to rent a house. Whether you want more yard space for your pet, privacy from neighbors, or the simple luxury of getting packages delivered to your…
Apartment Living
8 Min. Read
How to Create the Perfect Reading Nook in Your Rental Home
Creating a reading nook is a great way to make your space feel like home. Even if you’re not the biggest bookworm, dedicating a spot to unwind, relax, and mentally escape from day-to-day life…
Apartment Living
10 Min. Read
6 Best Smart Devices for Your Rental
Just because you live in an apartment doesn’t mean you can’t have a “smart home.” Even with limited square footage or strict lease parameters, there are plenty of smart devices that can elevate your…