Hello and Welcome Back to the Rent Pretty Series. I’m Kelly from Here Comes the Sun. Last week, I showed you some great examples on how to decorate your rental using temporary solutions that won’t damage your walls (or your security deposit). Today, I am going to show you how I used one of those solutions and transformed my kitchen by updating my cabinets with contact paper.
My kitchen is very basic and very builder grade. Take a look. And no, it is not usually clean like that. More often than not, there is a pile of dishes in the sink.
I really don’t like the color of my cabinets or the countertops. Until now, I thought that I just had to live with it because a kitchen remodel just isn’t going to fly with the landlord. Painting the cabinets is out of the question too but covering them with contact paper is not! First, take off the doors and remove all the dishes. I separated our dishes into the “nice” stuff and the “not so nice” stuff. The “not so nice” got stashed away out of sight in the bottom cabinets. The “nice” stuff got displayed in the updated cabinets.
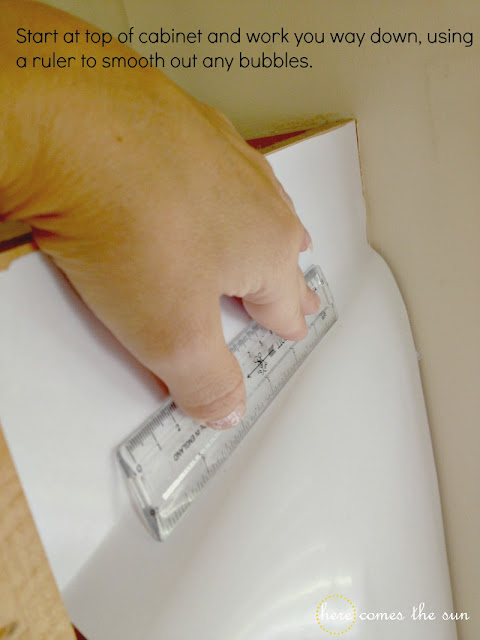
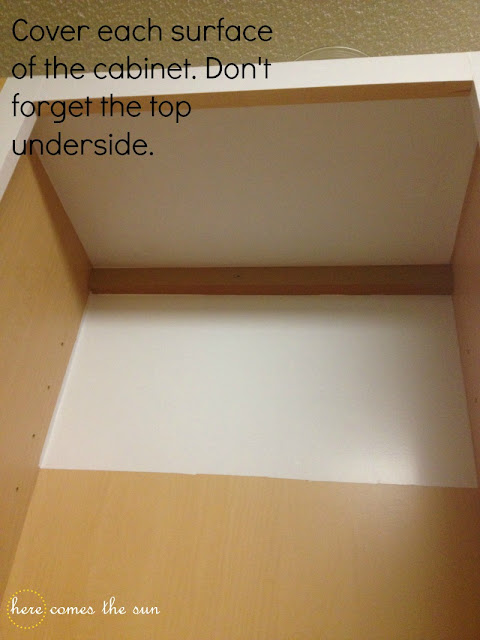
For each cabinet, I measured each surface (outside, inside, top, bottom and all trim) and cut my contact paper to size. It is good to cut the pieces a bit bigger than you need them because you can always trim of the excess with a razor blade to get a nice clean edge. To avoid bubbles, start at the top and work your way down each surface of your cabinet using a small ruler to smooth out the contact paper as you go.
Take out the shelves and cover the underside and the front face of each shelf with contact paper. I placed a no slip liner on top of the shelves so I did not use contact paper on the top.
For the backs of the cabinets, you can either use white contact paper or a contrasting color/design. I chose white.
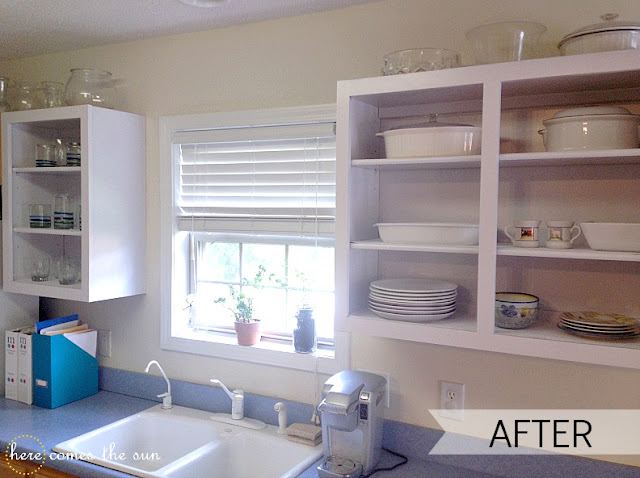
After you have covered all the surfaces, re-install your shelves and arrange your pretty dishes!
This project takes some time but it is not very difficult. It is definitely an improvement from the “before” picture. Let’s take a look at that “before” picture again.
And after! Much better!
So if you have an outdated kitchen and can’t demo or paint, try contact paper! You’ll get a brand “new” kitchen and you won’t lose your security deposit!
Hello! I’m Kelly, creator of the blog
Here Comes the Sun. My husband and I owned a home for seven years. Two and a half years ago, a job transfer took us out of state and now we rent. I’m currently in the process of making over our rental one temporary solution at a time. DIY is my passion and I love to share the projects that I do and the tips that I find.


