As a renter, I am always on the lookout for inexpensive, chic and most importantly, temporary, ways to give my apartment walls some personality. While paint can go a long way in adding strong doses of color or pattern to walls, sometimes your property’s rules don’t allow painting or you might not be up for the fuss and mess. While vinyl has gotten a bad rap in recent years for being too juvenile, I am here today with four creative ways you can use vinyl on your walls to give them a majorly chic (yet removable) makeover!
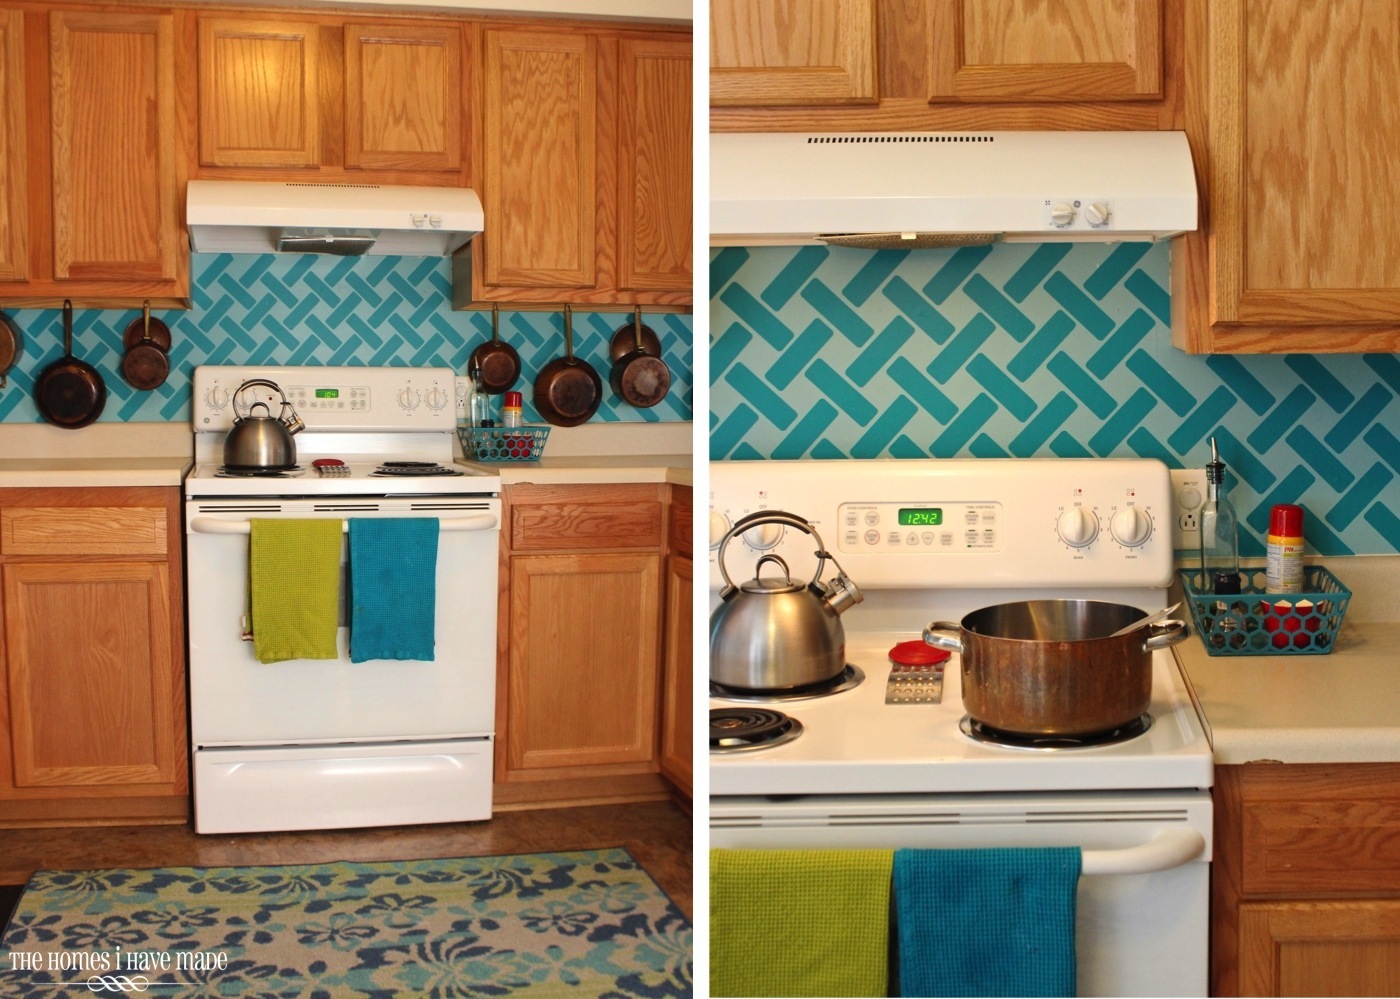
Here, simple vinyl rectangles are applied to the wall in the kitchen in a cross-hatch pattern to give the illusion of a tiled backsplash. This pattern can be a bit busy when done in contrasting colors, so give the monochromatic effect a try in a tone that complements your kitchen’s features and accessories. In these pictures, the walls were first painted a light blue and then dark teal rectangles were added on top.
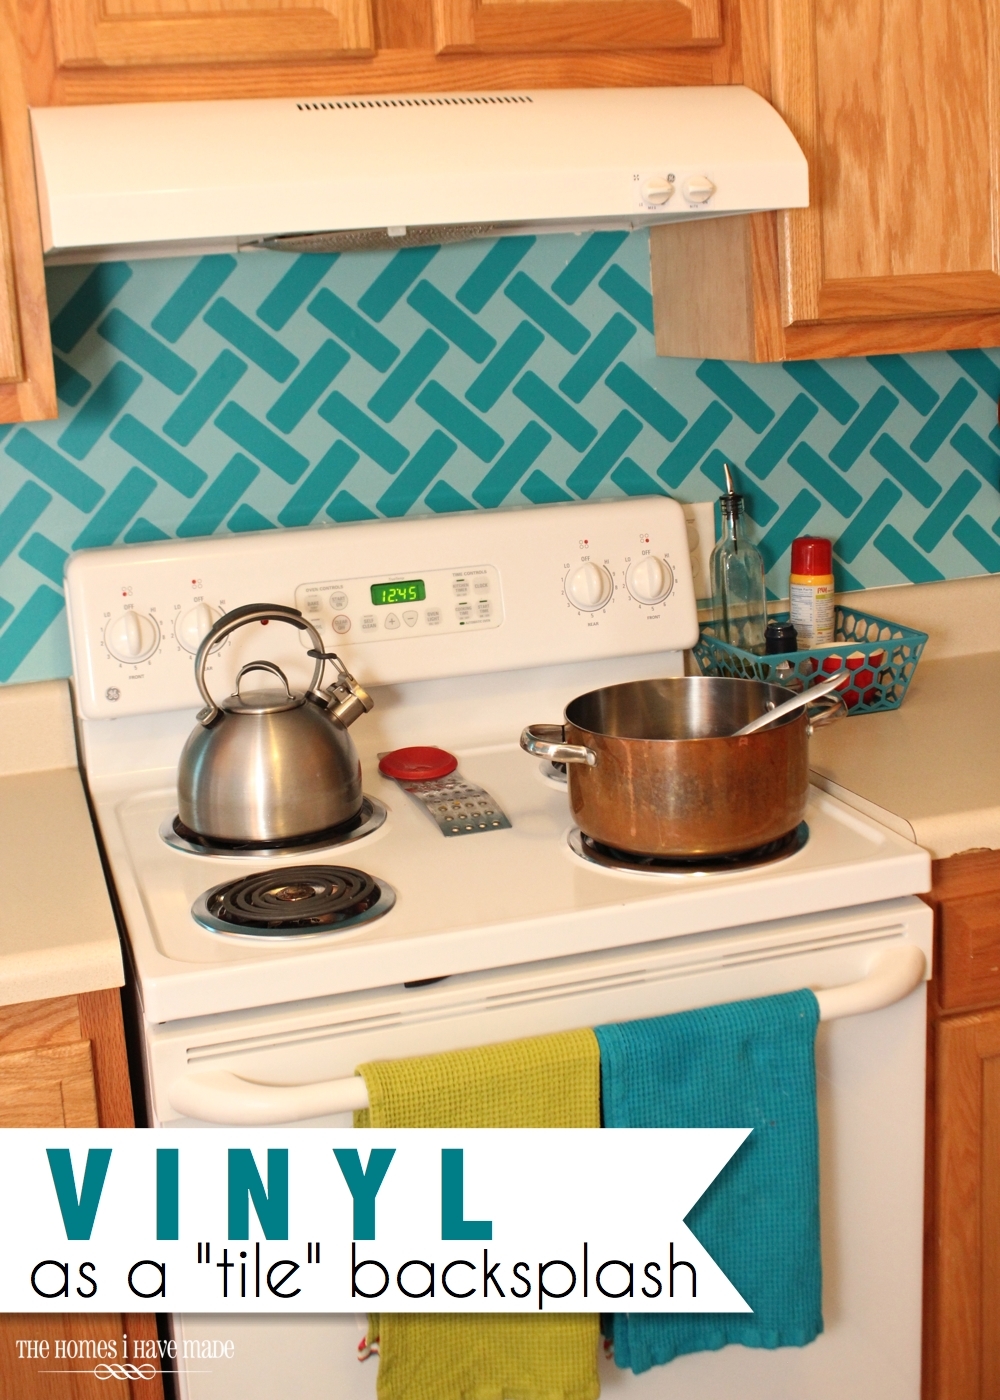
To achieve this look, use scissors (or an e-cutter for quicker results!) to cut out lots and lots of vinyl rectangles. Using a level for your initial placement, apply two rectangles on the wall with the short edge of one rectangle centered on the long edge of the second (the rectangles should be perpendicular to each other). Slowly and carefully, continue to work outward from your first two rectangles by arranging the short ends of rectangles in the middle of the longer edges of previously placed rectangles. Pay close attention to what you’re doing; this pattern can drift and spread if you aren’t consistent with your spacing!

It will take quite a bit of time and patience, but once complete, you will be left with a striking conversation-piece-of-a-backsplash to liven up your kitchen!
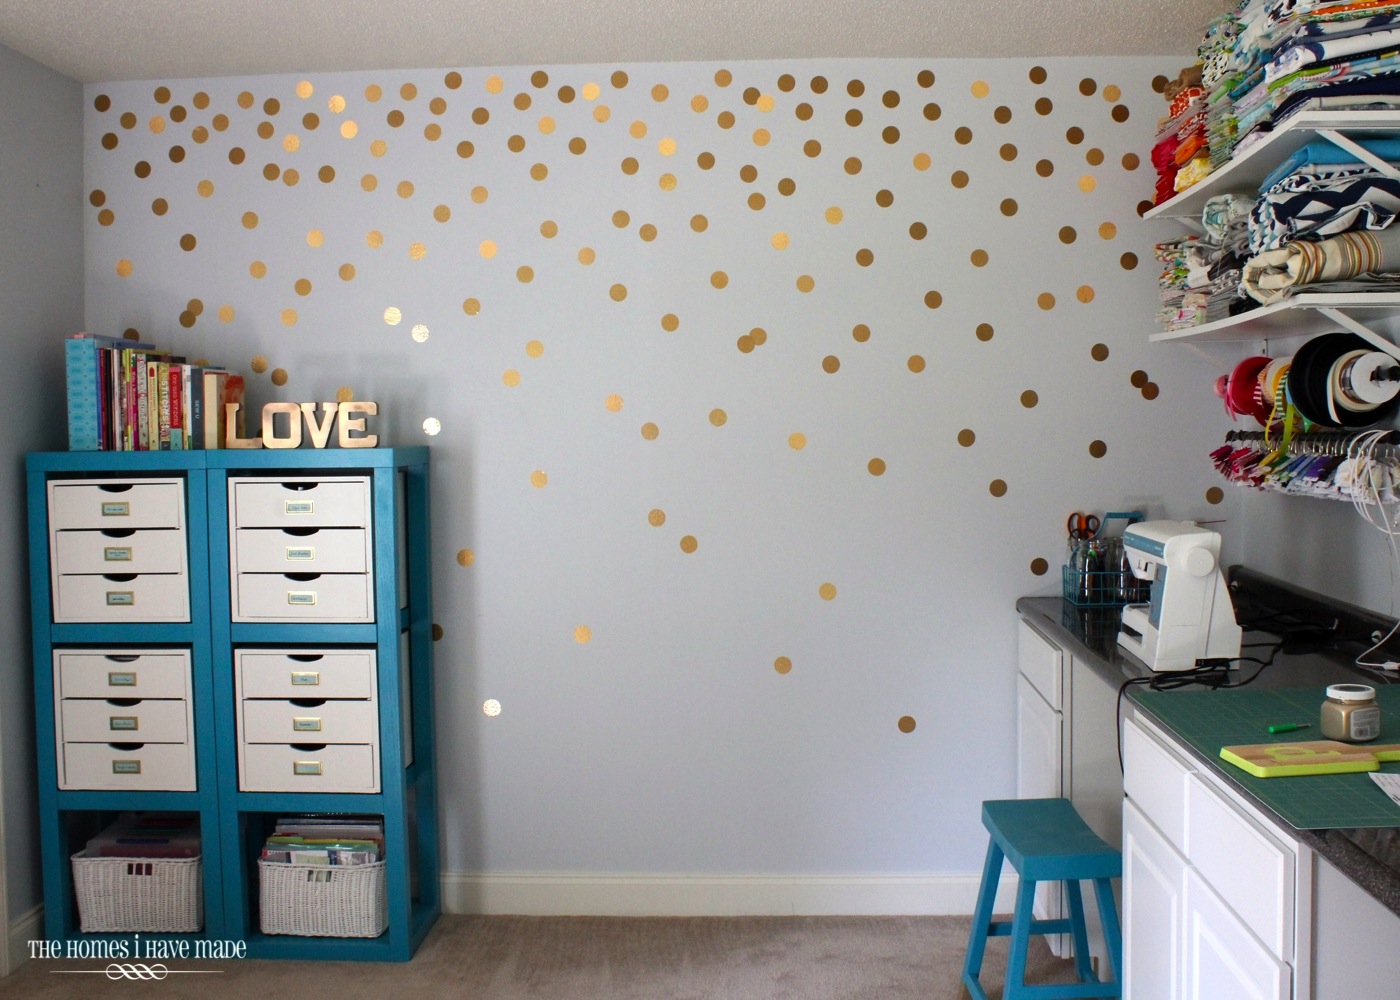
If patience and attention to detail aren’t your thing, you can use a similar concept to give a glamorous wallpaper effect to your space. Here, randomly placed gold dots are cut and placed in just minutes to create a unique and fun feature wall!

Using a punch or an e-cutter, cut out a bunch of 2″ circles from gold contact paper or colored vinyl. Working your way from top to bottom (or if you prefer, bottom to top), place your gold dots on the wall in a confetti-like pattern. This time, randomness is key, so step back frequently to see where you need more or less dots to achieve your intended look.

This dot effect is great for a feature wall, making it a super quick and inexpensive project. Also consider placing dots on the ceiling or in a evenly-measured pattern for an alternate look.
Images and phrases applied on the wall are among the most common ways to use vinyl. While this look can occasionally be plain and random, in the right places and doses, this concept can be the final touch to bring a room or space together.

Nurseries and kids rooms are great places to use silhouettes of shapes or animals as inexpensive, thematic, and fun wall art. This time around, four different owls were cut from different colors of vinyl (using an e-cutter) and applied to a vinyl “branch.” A complementary phrase, also done in vinyl, helps give the owls more of a visual presence and make the entire arrangement a more appropriate scale for its location above the crib.

If adding words to your wall is something you like to do, try giving them a bit more interest by mixing up fonts and using multiple colors.

“Happy Day,” cut by e-cutter from teal and yellow vinyl, is the perfect sentiment for this family command center. Also, don’t forget to think outside the box: vinyl doesn’t just have to be applied directly to the walls. Trim vinyl down to strips, fold the strips over some string or ribbon, and trim the ends with scissors to make simple and color-coordinated bunting for any space in your home.

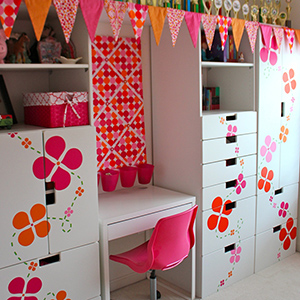
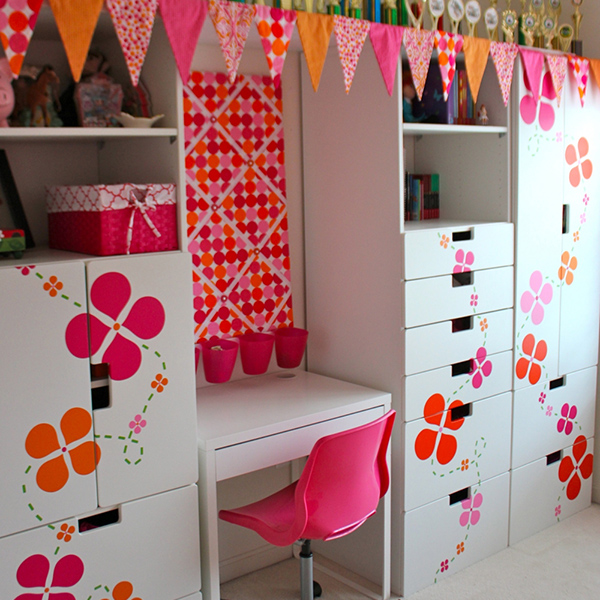
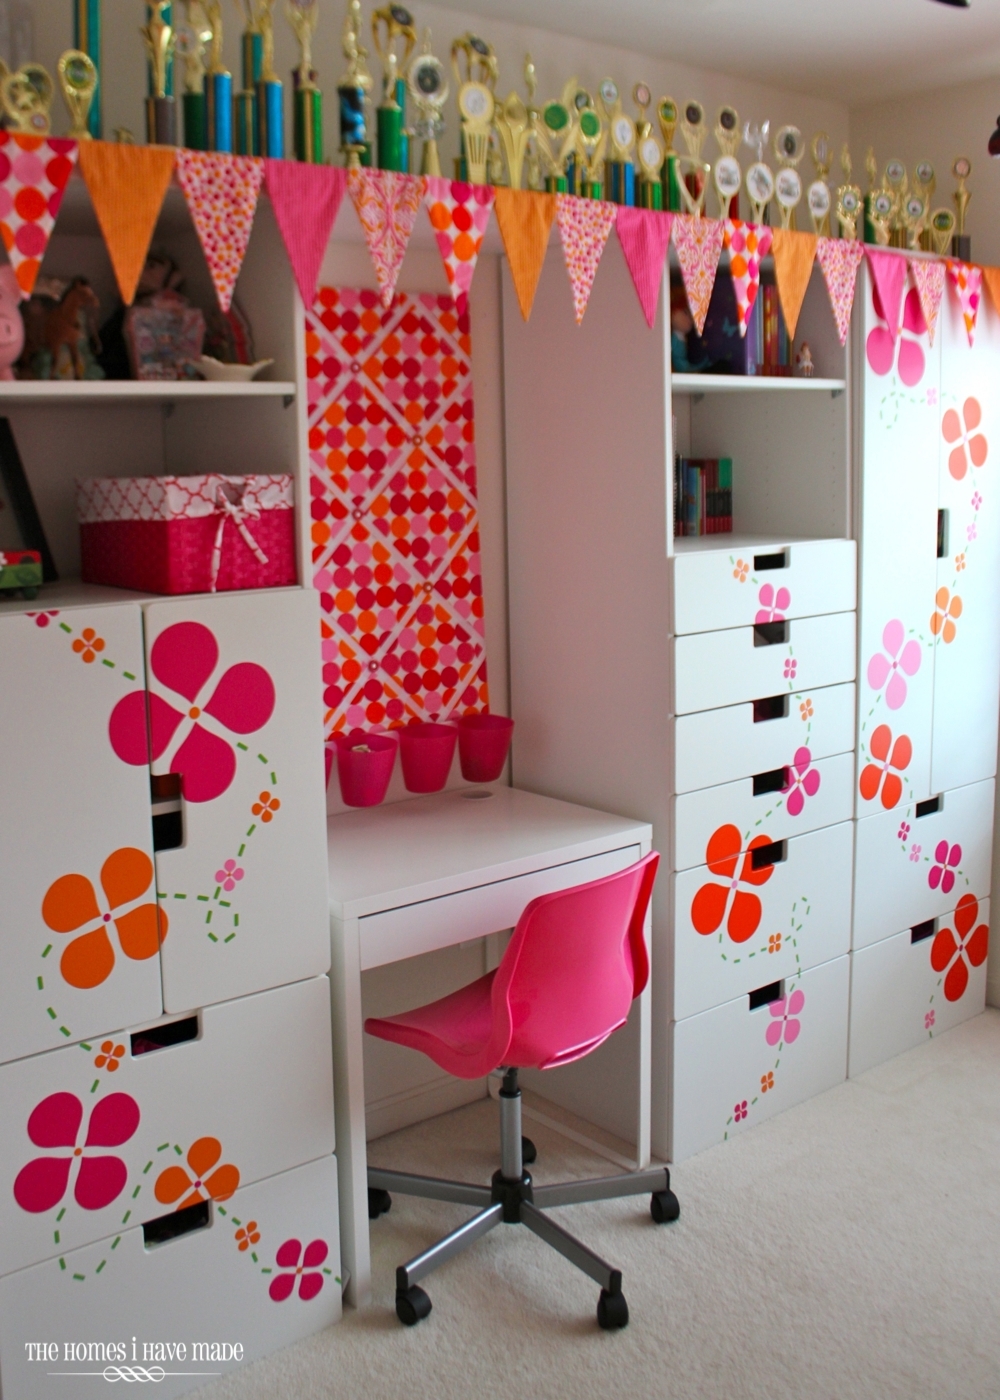
Last but not least, vinyl is also something that can be added to shelves, cabinets, doors and other solid furniture to give a room a patterned punch!

Here, the room’s curtain fabric provided the inspiration for the vinyl pattern. Simple four-petal flowers were cut in various sizes from two shades of pink and orange vinyl and then placed in a random flowing pattern down white cabinets. Using transfer paper allows you to lay out the arrangement before fully applying the flowers to the cabinets.

In this all-white girl’s room, the flowers add a huge pop of color that can easily be removed when it’s time for a makeover!
These days, vinyl is available in all sorts of colors and finishes, so the possibilities really are endless. While most of the ideas shown here are projects anyone can pull off with just a roll of vinyl (or 3!) and a scissors, using a die cut machine or e-cutter can make vinyl projects super quick, clean and simple! However, if investing your time and money to DIY these projects isn’t your thing, a quick glance through Etsy will reveal all sorts of ready-made vinyl options that can be delivered to your doorstep!
If you’re a renter, vinyl should absolutely be in your décor “toolbox” because, as you’ve seen here, it is possible to achieve some really neat looks using a medium that is relatively quick and completely removable. Even if you’re not a renter, vinyl can provide a lot of flexibility and allow you to apply effects to your walls without the hassle of paint. If you’re short on inspiration and don’t know where to start, look at images in wallpapers, stencils, fabric and wrapping paper and consider if they can be somehow replicated with cut out shapes of vinyl. If the answer is “yes,” begin cutting and create a fantastic feature wall, backsplash or piece of furniture with a (removable) design all its own!
For more DIY and How-To projects, visit the DIY section of the ForRent.com blog, and be sure to check out even more of Megan’s work on her blog, The Homes I Have Made!

