You just moved into your new rental, and you can’t wait to start making it like home. But once you’ve painstakingly purchased basic furnishings and other necessities, you may be surprised and disappointed to see your decor budget dwindling. If you still have expanses of empty walls staring at you but no budget (or desire!) to invest in “real” artwork to fill them up, consider making your own! You don’t have to be an artist or even crafty to fill your walls with fun and colorful statement pieces. These 12 DIY Art Projects are simple and budget-friendly, and most require just a few supplies to make a big impact!
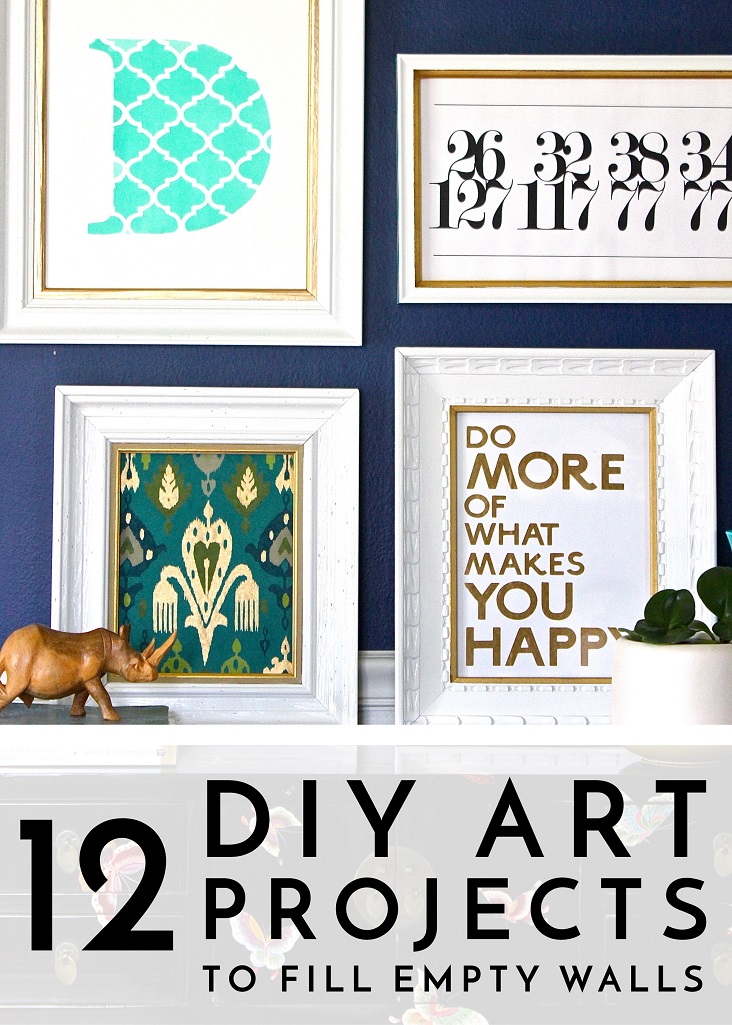
Stenciled Monogram
Don’t know where to start with DIY art? A monogram is always a safe and simple bet. Use a blank canvas, stencil, and some acrylic paint from the craft store to put a unique spin on a traditional monogram.

Load the canvas into a re-painted thrifted frame for an eye-catching piece of pop art! See the full tutorial for this project here.

Fabric Pop Art
Fabric is often cheaper than art prints so it’s a great place to find budget-friendly visuals. If you find an interesting pattern, simply wrap a canvas with it or load it into a frame for instant art. If you find a fabric with really interesting illustrations (like these sea creatures), cut them out and glue/iron them onto contrasting paper or fabric.

Using this method, a single yard of fabric can yield a whole gallery wall worth of prints. See the full tutorial for this project here.

Subway Letter Art
Names, phrases, important dates, song lyrics, streets you’ve lived on, places you’ve traveled to and more can also become interesting and meaningful art when re-created in large, bold and graphic ways. Play around with some of your favorite fonts to create something visually interesting and unique.

Best of all, you don’t need a fancy machine to bring your phrase to life size. This tutorial shows you exactly how to get the popular word art look with just your computer printer and a paint brush!

Dress Up Inexpensive Art
Home stores such as Marshalls, HomeGoods, TJMaxx, Ross, Target, World Market and more often have large art at really reasonable prices. However, they can often feel generic and boring since they are often mass produced. Try taking your generic art up a notch by putting it into a frame.

If your art is a strange size or too big for an inexpensive frame, you can easily DIY one in any style, color and size you need using this tutorial!

Think Beyond the Frame
Online shops like Etsy and Society 6 are great places to source inexpensive prints for every style and taste. When you add on the frame however, especially for larger prints, the affordability seemingly disappears. Consider skipping the frame and trying different methods to display and protect your prints. Sandwiching a print between two pieces of acrylic (from the hardware store) is a great alternative.

The result is a budget-friendly, modern, clean and simple way to highlight a great piece of art while keeping framing costs in check! You can see this full tutorial here.

Important Numbers Art
Birthdays, anniversaries, house numbers, zip codes, longitudinal and latitudinal coordinates, phone numbers and other numbers can be used to make interesting and meaningful art. Play around with a variety of numbers and fonts until you come up with an arrangement you love. Have it printed for just a few dollars at a print shop and trim it down to your frame size.

Once loaded into a frame, the simple numbers take on a modern and artistic vibe. This type of project also makes for great conversation starters: have you guests guess the meaning behind the numbers! See more on how to do this art project here.

Paper Iris Artwork
Sometimes looking to traditional and childhood crafts are a great way to find inspiration for artwork. Here, ombre-colored paper strips were folded and taped into a traditional iris pattern.

When done on a large scale and in multiples, this traditional paper technique makes for modern and interesting artwork. You can see how easily these come together here.

Paper Quilt Artwork
Quilt patterns are another great place to look for inspiration; but don’t worry, you don’t need to be able to sew to translate the cool effects to your walls. Instead, re-create the patterns using paper. Here, various sheets of white and colored cardstock were cut into descending-sized squares and glued together as shown:

Once spliced and re-glued together in interesting patterns, the paper squares make for really fun and interesting display for mere dollars! See the full tutorial for this project here!

Paper Flower Artwork
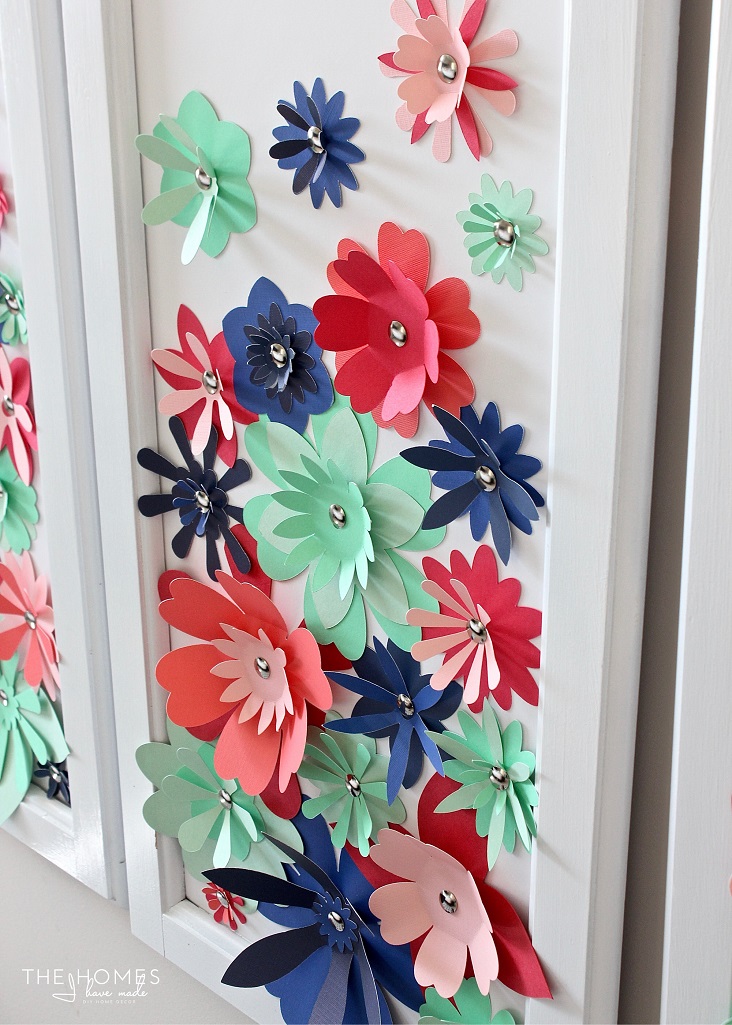
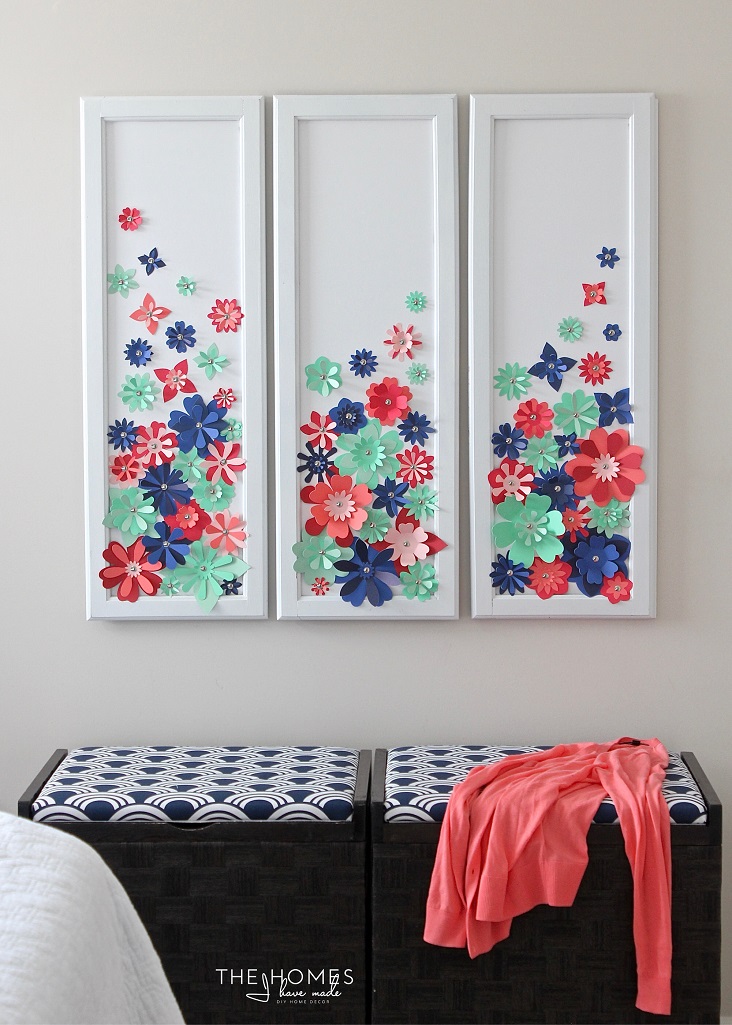
If you do have access to an electronic die-cut machine (i.e., a Cricut or Silhouette), you can quickly and easily cut out a variety of shapes from paper that can then be combined to create stunning artwork. Here, a vast variety of flower shapes were cut from various colors and shades of cardstock. The flowers were then layered and secured to a sheet of foam core using push-pins.

Once framed and hung in a gallery-style arrangement, the effect achieved via paper is simply amazing! See more on how to make this project here!

3D Paper Wall Flowers
Do you love the look (and low cost!) of paper flowers but have a lot of wall to fill? Skip the frames and secure the flowers right to the wall instead. This time, the basic flower shape can be easily cut out with scissors. Once folded into quarters, layer it with flat flowers using glue or tape.

Create these in a variety of sizes and scatter them across your walls for a whimsical display! You can see more about this project here.

3D Paper Art Installation
So you love the cost and look of paper, but flowers aren’t your thing. This project uses the same concept in a more simple and modern manner. Start with squares of colored cardstock and fold each corner to the center.

Continue folding squares in a variety of shades and then use masking tape to secure them to your walls in whatever arrangement you like! Not only is this a great way to fill up a lot of blank walls, but the paper also makes for a great party table or photo booth backdrop! See more on how to put this together here.

Wallpaper Silhouette Art
Animal silhouettes or familiar/meaningful icons are also great subjects for DIY art. Cut out the silhouettes of some of your favorite images from thick wallpaper remnants. Secure them to a piece of painted plywood with glue and cover with a clear liquid acrylic.

Once dry, hang them in a series for a colorful and eye-catching display. You can see the full tutorial for these here.

[tweetthis]Have empty walls and a creative eye? Check out these 12 #DIY wall decor projects! [/tweetthis]
Filling up expanses of empty walls in your rental doesn’t have to be stressful or expensive. Start with images, colors, shapes, phrases or numbers that mean something to you and then pair them with one of the techniques shown here. With just some basic and inexpensive craft supplies and a few hours of time, you can create fun, personal, unique and meaningful artwork for your home!
12 DIY Art Projects To Fill Up Your Empty Walls
DIY

Recommended Articles
Apartment Living
2 Min. Read
How to Plant Succulents in Your Apartment
If you’ve been thinking of using plants for decoration in your apartment, may we suggest succulents? What are succulents, you ask? Only the hottest new trend in the plant world, of course! But if…
DIY
3 Min. Read
No-Fail Tips for Styling a Bookcase
Do you have a bookcase or shelving unit in your apartment that just never seems to look “right”? Well, you’re in luck today because I’m walking you through my no-fail tips for styling a…
DIY
6 Min. Read
DIY Skills Every Apartment Dweller Should Know
One of the best things about being a renter is that you don’t have to do repairs on your home! Even though you can rely on your landlord or friendly maintenance worker to take…
DIY
5 Min. Read
Should I Paint My Rental?
Of all the “tools” in a renter’s “toolbox,” paint is a favorite. Not only is it relatively inexpensive and usually reversible, but it is truly one of the most effective ways to change the…
