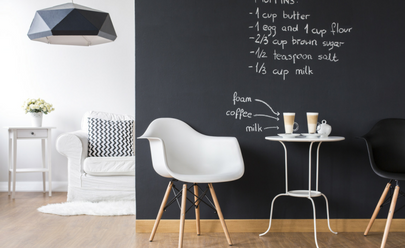
When apartment living gets busy, family members and friends can quickly lose touch. What a better way to stay updated than to have a message board? Leave notes, recipes, appointment reminders, and more up on a chalkboard in your kitchen. Younger children will love to doodle on it, and you will love staying connected to your roommates and family.

What you will need:
- 20″ x 46″ x 1/4″ sheet hardboard
- 23″ x 51″ x 1/8″ sheet hardboard
- (2) 49-1/2-inch lengths 3-1/2-inch wide primed baseboard
- 20″ x 3-1/2″ primed baseboard
- 27″ x 4-1/2″ primed baseboard
- 28-1/2″ x 3-1/2″ primed baseboard trimmed down to 1 1/2–inch
- 28″ x 3-1/2″ primed baseboard trimmed down to 1 inch
- extra strength wood glue
- caulk and caulk gun
- extra fine sanding pad
- painters’ tape
- roll masking paper
- white spray paint
- clear protective spray
- chalkboard paint (in black or tinted to the desired color)
- chalk
- 2 ring hangers
- picture wire
- 2 picture hooks and nails
This list sounds like a lot, but once you get started it will be simple!

Instructions:
Cut and Lay Out Pieces: Get the board cut down to the size you would like to fit in your kitchen.
Glue Together: Apply the extra strength wood glue to all edges of the wood. Firmly press together and wait to let dry.
Attach Backing: Attach larger hardboard piece with wood glue to the back to secure the frame and message board.
Apply Caulk: Carefully turn over message board and apply caulk to the inner corners of where the hardboard meets the edging. Let dry.
Paint and Seal Frame: Cover hardboard with paper and tape down to protect the surface. Spray paint frame, let dry, and cover with a lacquer.
Tape Edges and Paint Chalkboard: Apply painters tape around outside edging, and paint hardboard with chalkboard paint.
Attach Hardware: Screw two ring hangers into back of chalkboard and attach picture wire between rings. Hang on a wall in your kitchen

And that’s it! A tip they gave on HGTV is to prime the surface of the chalkboard before using by covering the entire surface by rubbing chalk on it, and then erase. This allows the board to become familiar with the chalk.
This lovely DIY project will look great in any home, and keep family and friends up to date with each other’s busy lives!
Pictures from: envisiondotnet, amy.gizienski
Instructions from: HGTV

