One of the best things about being a renter is that you don’t have to do repairs on your home! Even though you can rely on your landlord or friendly maintenance worker to take care of big repairs, there are a few DIY skills that even apartment dwellers should know.
How to Fill Nail Holes
When it comes time to move out of your apartment, you may want to do a little damage control before your landlord comes to inspect the place. If you have put a ton of holes in the walls with all your wall art, you might need to do a bit of repair work. Don’t worry, it’s easy!
Start with some sticky notes. Walk through your apartment, and whenever you find a nail hole that needs to be filled, put a sticky note over it. Next, head to the hardware store.
Get a few basic supplies:
Spackle
Sandpaper
Putty knife
Begin scooping a small amount of spackle out of the container using the putty knife. Apply the spackle to the first hole, sort of like you are frosting a cake. Use the straight edge of the putty knife to remove any spackle that isn’t flush to the wall. Repeat this process with all the nail holes in your rental.
Before you move to the next step, the spackle needs to dry. When it is, use the sandpaper to lightly sand away any spackle you did not remove with the putty knife. Now the walls are ready to be painted —either by your landlord or by yourself.
How to Paint a Room
If you are allowed to paint your rental (or you must paint before you move out), you will need to know the basics of painting a room. The process is not hard, but it can be time-consuming. And very little of the time you spend painting a room actually involves painting!

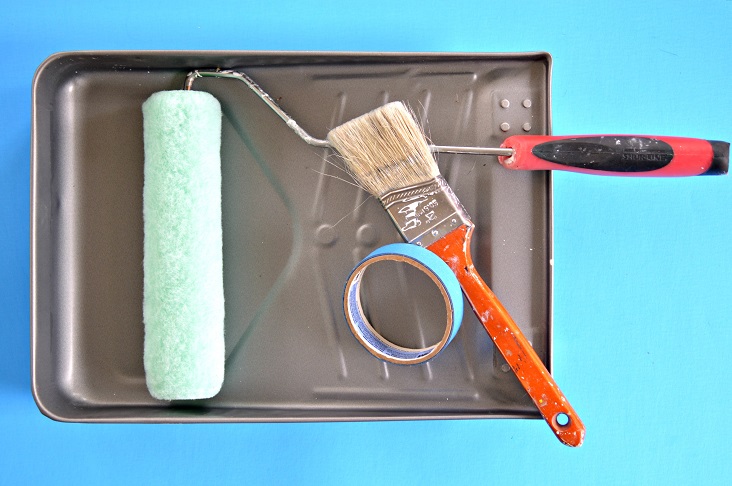
From the hardware store, you will need:
Paint, usually latex indoor paint
An angled paintbrush (anywhere from 2-3” wide)
A paint pan
Paint roller
Paint roller covers
Dropcloth(s)
Painter’s tape
Stir sticks
Move all furniture away from the walls, and cover with an old sheet or a drop cloth. Cover the floor with drop cloths as well.
Give the walls a wipe down with water and allow them time to dry. Remove any light switch covers and outlet covers, and put the covers and screws in a safe place where you won’t lose them.
Use painter’s tape to mask off any areas you don’t want to paint: windows, doors, closets, etc. Run your finger over the tape’s edge to make sure it is making good contact with the wall.
Even though the hardware store gave the paint a good shake before you bought it, you still need to stir the paint again before you use it. Stir the paint slowly, making sure to scrape the bottom of the can as you go.
Paint from the top of the room down. If you need to paint the ceiling, always do that first before moving on to the walls.
Use your angled brush to paint along trim, in wall corners, and in any place a paint roller would not be able to reach.
Carefully pour some paint into the roller pan. Slip a roller cover onto the paint roller, and roll it through the paint in the pan. Apply the paint to the wall with the roller in a W shape, trying not to go over areas that you have already painted more than is necessary as this takes off as much paint as it deposits.
Allow the paint to fully dry, and then decide if you need a second coat of paint. Don’t freak out if the paint looks thin or splotchy, most paints require at least two coats. If you must do multiple coats, be sure to let one coat dry FULLY before adding another coat.
When your walls are dry, carefully peel the painter’s tape away. If you need to paint the room’s trim as well, apply painter’s tape to the wall next to the trim. Don’t forget to run your finger over the tape again!
Use your brush to paint the trim, using as many coats as are necessary. When the trim is finished and dry, once again carefully remove the painter’s tape from the walls.
How to Unclog a Sink Drain
There are lots of embarrassing things that you might need to call your building’s maintenance staff to take care of, but a clogged sink doesn’t have to be one of them! Most sink clogs can be removed with a plunger!
Head to the hardware store for a smaller version of your bathroom plunger. You don’t want to use that nasty old thing in your sink, do you?
Fill the sink partway with water, and stuff a rag into the sink’s overflow hole. Then plunge the drain just like you would plunge a toilet. When you have removed the cause of the clog, pour hot water down the drain to flush out any other gunk that may still be hiding in the pipes.
[tweetthis]Here Are Some Handy #Tips Every Renter Needs To Learn! These #DIY Skills Can Come In Very Handy![/tweetthis]
How to Hang Something Heavy
Typical picture frames can be hung with a hammer and nail, but some wall art requires sturdier hardware. Since you will need to create a larger hole to accommodate this hardware, you get to use… a power tool!

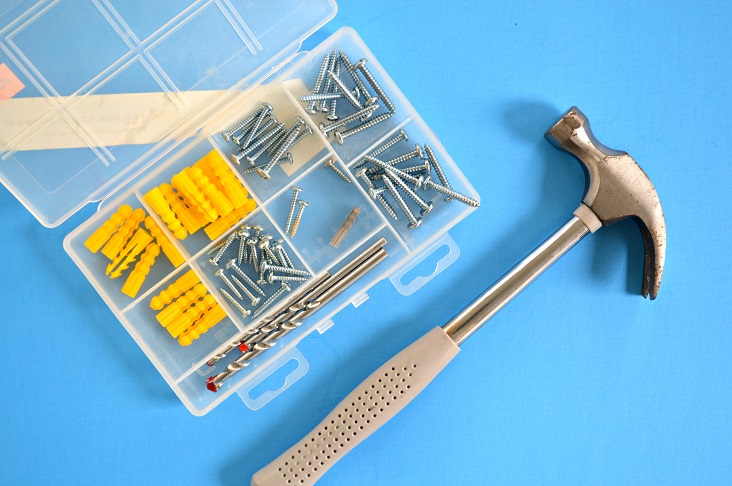
You will need:
A drill
A drill bit, slightly smaller than the size of your plastic anchor
Plastic wall anchors
Screws to fit the wall anchors
A hammer
Start by carefully measuring where you would like your wall art to hang. You definitely don’t want to make any more big holes in your apartment wall than absolutely necessary, so measure well!
Drill a pilot hole where your wall anchor will go. This just means that you drill a hole in the wall into which you will insert the anchor.
Place the anchor most of the way into the pilot hole, and tap it into place with the hammer. The anchor should sit flush with the wall.
Place a screw into the anchor, and tighten it with your hands. Now you can hang your heavier art on the wall!
With these DIY tips, you’ll be able to manage the basics of your apartment, saving your landlord calls for when you really need them! Your DIY skills will come in handy decorating your place using some of these tips and tricks.
