Brought to you by our friend Tommy Sibiga from TommyandEllie.com!
Do you know how much dining room chairs cost? Take that number and then multiply it by 12. What do you get? A very large number. A number that’s well beyond our means.
When I first started considering to build a dining room table, I researched how expensive dining room chairs would be to go along with our table. I was pretty shocked when I found that all the chairs that we liked ranged between $70 to $100 a piece. Our goal was to have the ability to seat 12 comfortably and so that total cost quickly shot up to $840 to $1200. Wowsa!
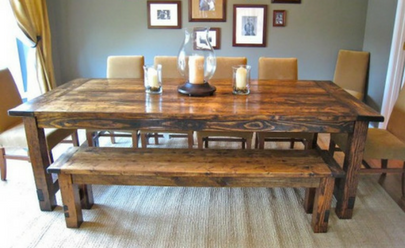
With the high cost of dining room chairs in mind, I needed to pick out a table design that I could also incorporate into a bench design to decrease the total number of chairs that we would need to buy. That was one of the big criteria in choosing the farmhouse design from the get-go. Once again, I came across the idea/inspiration/building plan from ana-white.com. Check out the building plan. The bench was a very similar process to the Farmhouse Table.
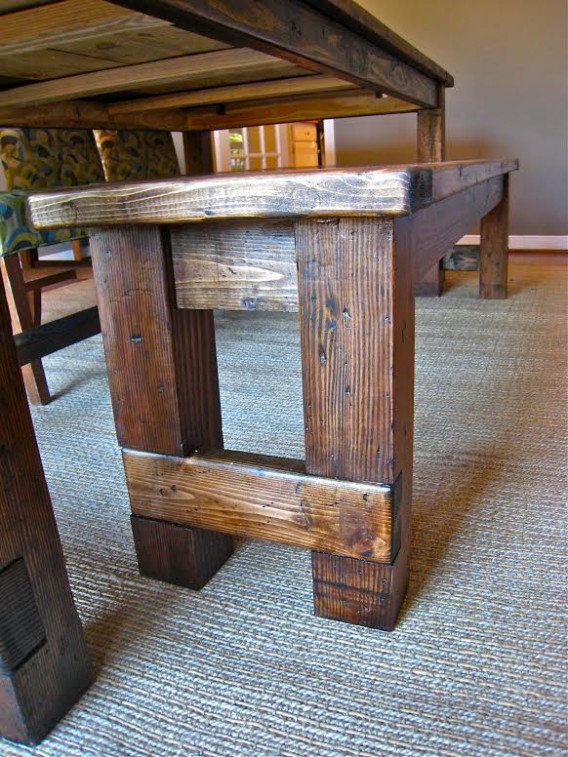
I started with the 4×4”s that were going to become the legs of the bench. They were leftovers from the 8’ lengths that I used to build the dining room table. I cut them down to 16.5” and began to notch them out. To do this, I set my table saw blade to a height of 1.5”, I ran them through the table saw making my first cut at 3.5” from the bottom, my second cut at 7” from the bottom, and then a bunch of tiny subsequent cuts anywhere in between that range. I then hammered out the little slivers and swirled it all around the table saw to smooth it out.

One major difference between the bench and the table is that I used a 2×4” as the stretcher instead of a 4×4”. You can notice the difference if you look closely at this picture but it’s a small enough difference that you wouldn’t be able to tell when you’re in the room.

Since the table top included 4 planks, I decided to use 4 planks on the bench….but instead of using 4-2×12”s, I used 4-2×4”s. I used my Kreg Jig and a bunch of clamps (I love clamps) to join the bench top together. The rest of the steps were simply cutting things to length, running them through the planner, rounding off the edges, and a small dose of distressing. I then clamped it all together and using some hidden pocket holes, tightened everything up. It was stained to match and instead of using the Briwax to finish it off, I put a couple coats of Polyurethane on it. The overall dimensions are 72”l x 14”d.

For more DIY projects from Tommy, check out his Farmhouse Table, his Gallery Wall, and his Dining Room Chairs today!
How to Make Farmhouse Benches
DIY

Recommended Articles
Apartment Living
2 Min. Read
How to Plant Succulents in Your Apartment
If you’ve been thinking of using plants for decoration in your apartment, may we suggest succulents? What are succulents, you ask? Only the hottest new trend in the plant world, of course! But if…
DIY
3 Min. Read
No-Fail Tips for Styling a Bookcase
Do you have a bookcase or shelving unit in your apartment that just never seems to look “right”? Well, you’re in luck today because I’m walking you through my no-fail tips for styling a…
DIY
6 Min. Read
DIY Skills Every Apartment Dweller Should Know
One of the best things about being a renter is that you don’t have to do repairs on your home! Even though you can rely on your landlord or friendly maintenance worker to take…
DIY
5 Min. Read
Should I Paint My Rental?
Of all the “tools” in a renter’s “toolbox,” paint is a favorite. Not only is it relatively inexpensive and usually reversible, but it is truly one of the most effective ways to change the…
