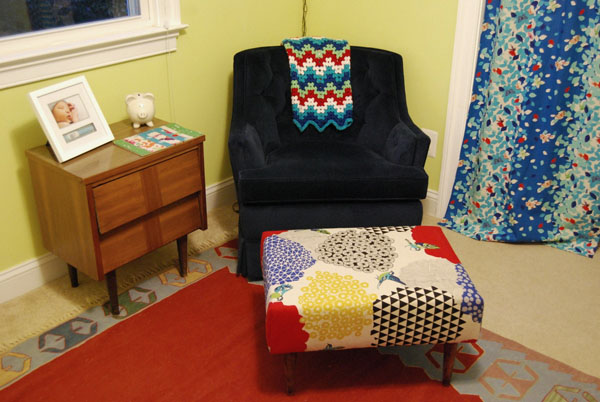
In small apartments, every piece of furniture needs to serve more than one purpose, as space is at a premium. A great multitasking must-have is the ottoman. Not only can you kick up your feet on it, but add a tray to the top and you have an instant side or coffee table. Need an extra seat at a party? An ottoman has you covered.
Even better are the variety of storage ottomans available now; they come in every shape, size and fabric. In the living room, a large, square leather ottoman can hold your board games, and the addition of a tray on top converts it to a coffee table. In the dining room, a long, narrow microfiber one can hold kitchen linens or extra appliances while serving as a bench seat at the table. In the bedroom, a round ottoman could serve as a bedside table while holding your extra linens or out-of-season clothes.
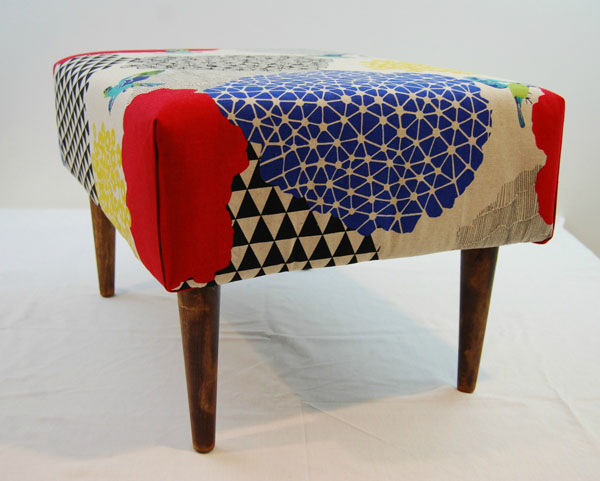
I recently recovered an ottoman that a neighbor was going to throw out. This reupholstering style would work for both a footstool ottoman like mine and a boxy storage ottoman. Ottomans are easy to find at thrift stores; here’s how to reupholster one to give it new life in your small space.

Supplies needed:
- An existing ottoman, old upholstery removed – or four short legs and a board
- Upholstery foam (2” to 4” thick)
- Quilt batting
- 2 yards mid-weight or upholstery-weight fabric
- Spray adhesive
- Staple gun and staples
How to:
Strip all existing fabric and padding off the frame of the ottoman. Tip: Taking photos of the “before” can help you when putting the new upholstery on the ottoman.
Cut a piece of thick upholstery foam to fit the top of the ottoman. Attach the foam to the top of the ottoman using spray adhesive.

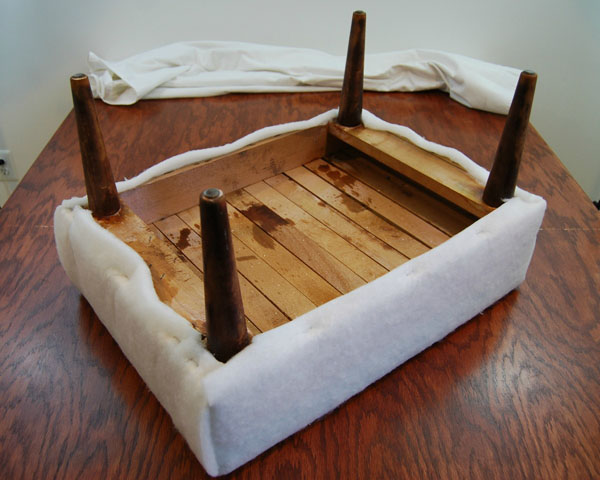
Next, spray adhesive onto the top of the foam, then cover it in batting, wrapping the edges down over the sides. Pull taut and staple the batting on the underside of the ottoman frame.

Center your fabric on top of the ottoman, using more spray adhesive to attach the fabric to the batting layer. Wrap the fabric around the sides of the stool, folding the fabric into straight seams at the corners and pinning them in place.

Turn the ottoman upside down and, pulling the fabric taut, start stapling it into place from the middle of each side. Carefully work your way out toward the corners. Tip: If the ottoman’s feet are removable, it’s easier to take them off and attach the fabric, then cut holes through the fabric to screw the feet back on afterwards.

When the fabric is fully stapled into place, remove the pins and lightly iron the corner folds to set them in place.

If you follow these instructions, you can recover an old ottoman in less than an hour. And if you don’t have an old ottoman, you can easily build a mid-century-inspired one using this tutorial.

