I’m in love with this project because it’s so easy and actually a lot of fun! However, it took me a while to figure out what to use for this project. At the end of one of my yoga classes the other day, it hit me: “Namaste!” What the heck is “namaste”? Well, it’s the Indian word spoken at the end of yoga classes that means, “The light within me honors the light within you.”
I’ve been practicing yoga for almost 20 years now, and I love it. It calms and centers me. I’ve incorporated the yoga philosophy so much in my life that I thought it’d be fitting to have the word “namaste” displayed in my house. It adds a special homemade touch to my boho vibe.
I love this project because you can customize the words or even a picture of your hobbies, passions, song lyrics, poem verses, etc. This project really personalizes your rental space and makes it your own.
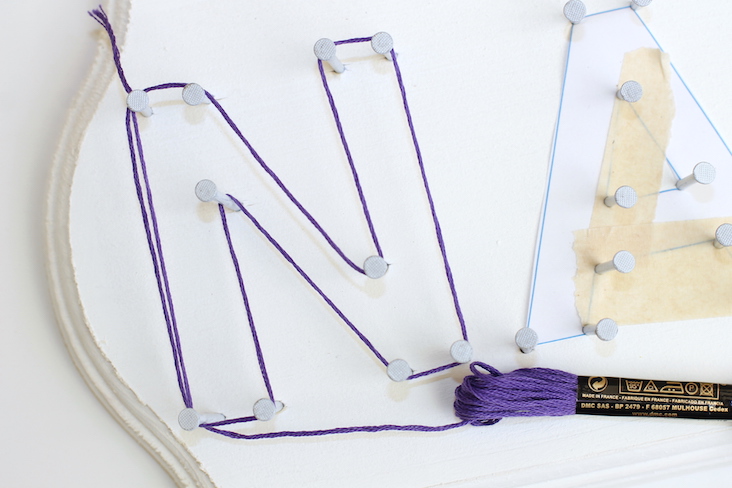
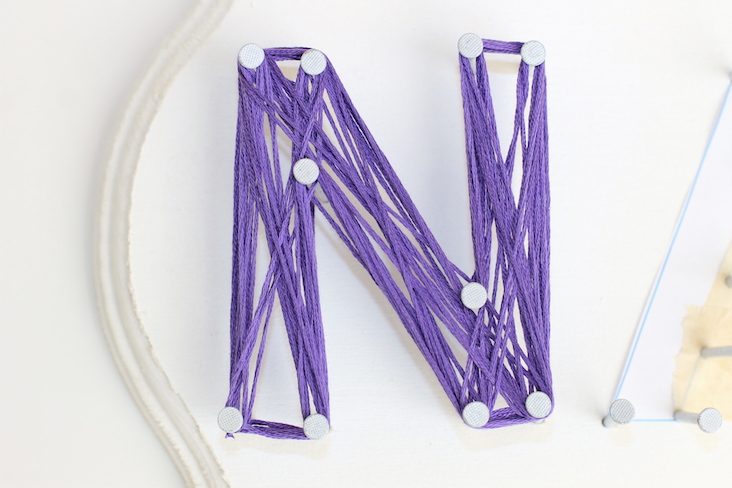
I thought it was going to take me a long time to hammer in all the nails that outline the letters, but honestly, it took about 30 minutes or so. Wrapping the string around the letters took less than an hour. The hardest part of this project was deciding what saying to use.
I also wanted to combine the trendy ombre (a cascading effect of dark to light colors) element to the project as well. I debated which colors to use but settled on grounding the bright purples by bringing the grays and silvers into the words.

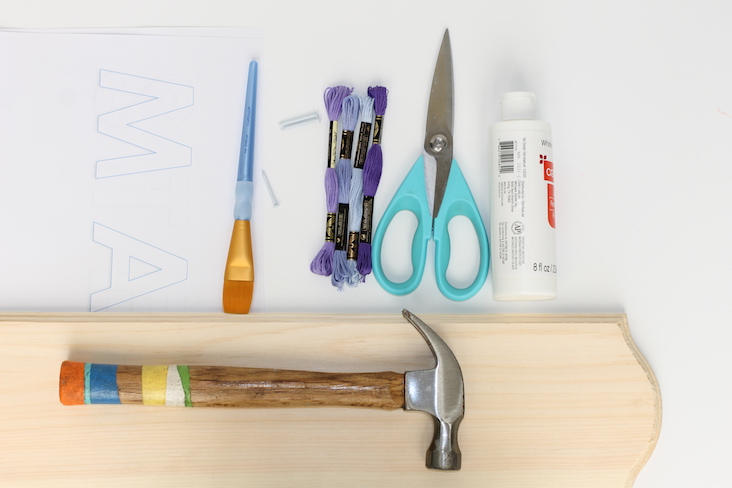
Materials:
-Printout of your saying (I used a Century Gothic font with an outline effect at 300-point type)
-Embroidery string (I used a roll per letter)
-Hammer
-Nails (These are 1 ¼” white aluminum trim nails)
-Wooden craft board
-White craft paint
-Scissors
-Paintbrush
-Tape (not shown in photo)
Instructions:


[tweetthis]Looking for a fun project? Check out this #DIY Ombre String Art for your #apartment.[/tweetthis]
Want to try your hand at more creative string art projects for your apartment? Check out this geometric string art tutorial or give this yarn hanging a go.
Make Your Own DIY Ombre String Art
DIY

Recommended Articles
Apartment Living
2 Min. Read
How to Plant Succulents in Your Apartment
If you’ve been thinking of using plants for decoration in your apartment, may we suggest succulents? What are succulents, you ask? Only the hottest new trend in the plant world, of course! But if…
DIY
3 Min. Read
No-Fail Tips for Styling a Bookcase
Do you have a bookcase or shelving unit in your apartment that just never seems to look “right”? Well, you’re in luck today because I’m walking you through my no-fail tips for styling a…
DIY
6 Min. Read
DIY Skills Every Apartment Dweller Should Know
One of the best things about being a renter is that you don’t have to do repairs on your home! Even though you can rely on your landlord or friendly maintenance worker to take…
DIY
5 Min. Read
Should I Paint My Rental?
Of all the “tools” in a renter’s “toolbox,” paint is a favorite. Not only is it relatively inexpensive and usually reversible, but it is truly one of the most effective ways to change the…
