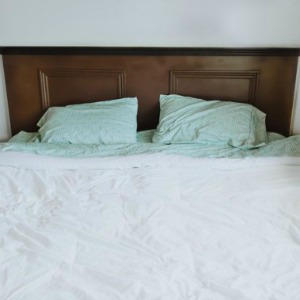
Once upon a time, headboards were used to help keep sleepers isolated from the cold drafts which would seep in between the roof and walls of a home. These drafts would then sink along the walls, creating areas of uncomfortable cold directly where most beds would be located. Headboards were designed to be made out of wood, which is a better insulator than many of the other materials available at the time, and acted as shields to help keep the cold from disturbing a bed’s occupant. Of course, with the discovery of improved building techniques, better insulated walls and roofs, and central heating, the headboard lost its original function, and became something of a relic.
Except where aesthetics are concerned.
A stylish or elegant headboard shows that your bed is more than simply a mattress and a pile of blankets; it adds an air of sophistication and maturity to a bedroom, and can be used to bring together the overall design of any sleeping space. Additionally, headboards can still serve the purpose of helping secure a bed in place, so that it doesn’t slide along the floor as you get in and out of it. Headboards can also offer a more firm support than a bare wall, for those times when you want to sit up in bed.
If you feel like a headboard is something you need for your apartment, but you don’t have a lot of money laying around to invest in purchasing one, you can always go the DIY route and make it yourself. After all, your basic headboard is really just a slab of wood of a specific size, which means that even those with absolutely no formal carpentry training should be able to create a beautiful headboard that they can be proud to show off.
So, allow us to help you get started! Here’s a step-by-step guide to building your own headboard from a salvaged wooden door.
Step one: Gather your materials
Now, in order to turn a door into a headboard, you’re going to need some materials, and you’re going to need some equipment. The most obvious and vital component to the entire project is a salvaged door. You may be wondering where to get such a door, and how much a salvaged door might cost. Start by checking your local classified ads, as you may be able to find an attractive door for almost no cost at all. You might also have some luck looking at yard sales, and at construction/deconstruction dump sites and in burn piles. Keep your eyes open, and check around online—you’ll be sure to find something. The most important thing to do is to find a door that looks nice, with a design that will compliment the rest of your room. Here’s a list of everything you’ll need:
- A solid wooden door
- (1) 2×2 lumber board (to be cut to a specific length)
- (1) 2×4 lumber board (to be cut to a specific length)
- Hand saw
- Mitre box
- Mitre saw or hack saw
- Drill
- Square
- Sandpaper (medium grade)
- wood putty
- Molding (can be purchased at hardware stores)
- Wood glue
- Primer
- Semi gloss paint (your choice of color)
- Wood screws
- Pencil
- Tape measure
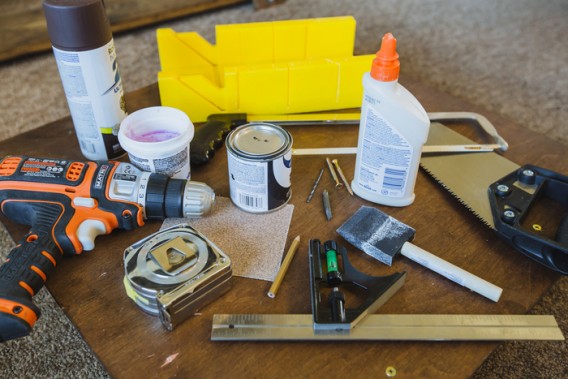
One of the great things about this project is that you don’t need access to a full workshop; feel free to get your headboard ready wherever you have enough space (just be sure to allow for proper ventilation once you start priming and painting). Once you’ve designated a workspace, organize your materials so that you’ll have access to everything right when you need it.
Step two: Cutting the wood
Once you have your door, compare it to your bed. The door will need to be a few inches taller than the bed is wide. Position the door sideways at the head of the bed, centering any design details that may be present on the wood. Use a pencil to mark where to make your cuts, so that you can trim the door down to the correct length.
- If you decide to use a power saw, be sure to measure multiple times before you commit yourself to any cuts. Also, use a straightedge when making your marks so that they stay on course
- Always wear protective gear (safety goggles, ear guards, etc.) whenever operating power tools, and if you feel unsure about how to properly use your equipment, hire a professional—saving a few dollars isn’t worth risking your health.
- Cut the wood slowly, and in small increments; it’s better to cut off too little wood, and then to have to cut more, than it is to cut off too much.
Step three: Fill the holes and attach the molding
- Make a close inspection the headboard to see if there are any holes, scrapes, or divots in the wood.
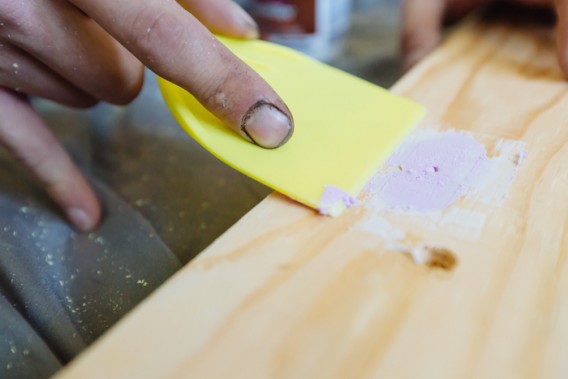
- Use wood putty to fill in these imperfections. Allow the putty to sit until it is hardened, and then use sandpaper to smooth the surface of the wood until it is uniform. Wipe the headboard down with a damp cloth.
- Turn the headboard so that it extends horizontally across the bed. Take the molding and cut it to the appropriate length of the headboard using the mitre box to get the 45º angle right. Attach the molding to the top and sides of the headboard using wood glue. Wait for the glue to dry.
- Before you paint your headboard, coat the wood in paint primer. Allow the primer to dry.
- Add two coats semi-gloss paint. Allow the paint to dry.
Step five: Give the headboard legs
- Using a tape measure, measure the distance from the top of the headboard to the height you would like it to be at.
- Cut your 2×2 lumber board to stand six inches lower than the finished height of the headboard.
- Cut your 2×4 lumber board into two pieces the distance between the headboard and the desired height.
- Create the two supporting legs of the headboard by screwing one 2×2 onto one 2×4 lengthwise so it looks like a stilt. (to avoid potentially splitting the wood, drill a hole smaller than the screw into each piece and then put the screw in).
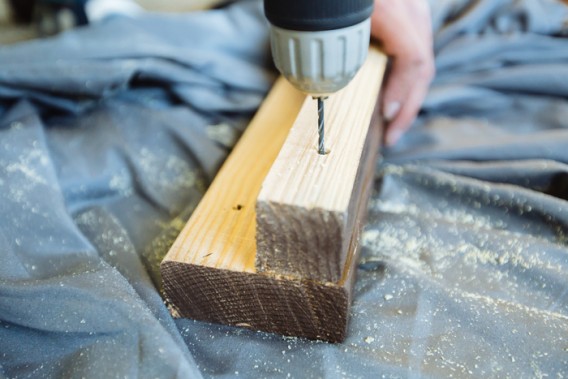
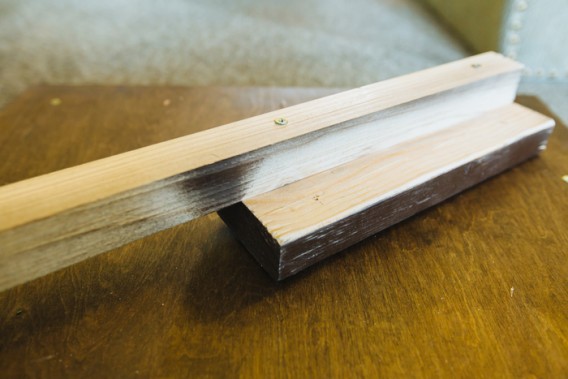
- Place these legs with the headboard resting on the 2×4’s and screw the 2×2’s into the back of the headboard.
- The headboard should sit snugly against the wall, with the pressure of the bed holding it against the wall.
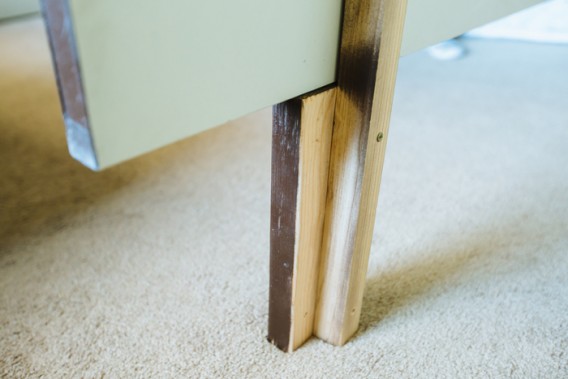
- If you would like to attach the headboard to the bed frame itself simply line up the legs to the bedframe, mark the bolt holes from the frame and drill them out. Lastly attach the legs to the bed frame with bolts, rest the headboard on the 2×4’s, and screw in the 2×2’s to the headboard.
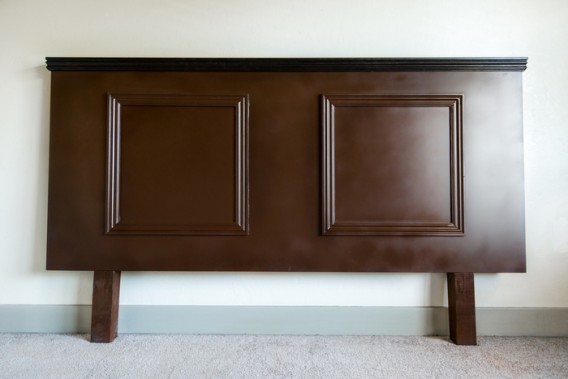
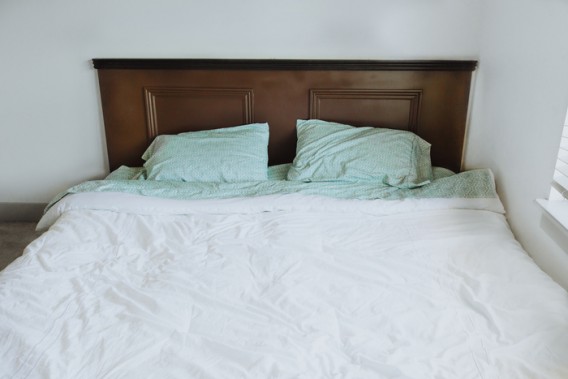
So, whether you want to use it for blocking drafts, securing a bed in place, or just to improve the ambiance of a room, a simple DIY headboard may be just the thing that your apartment needs.

